1980 Chevrolet Monza Spyder
1980 Chevrolet Monza Spyder
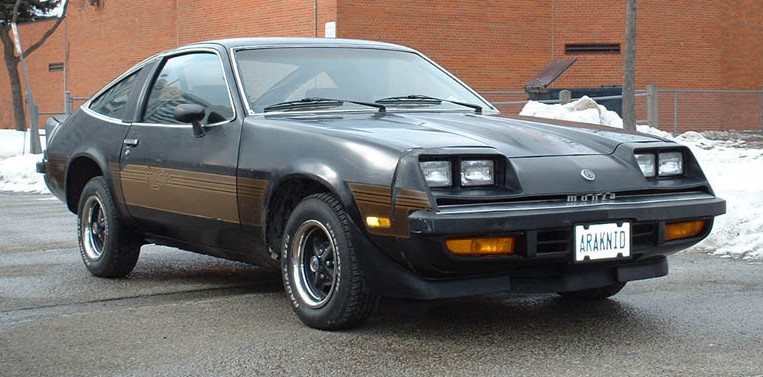
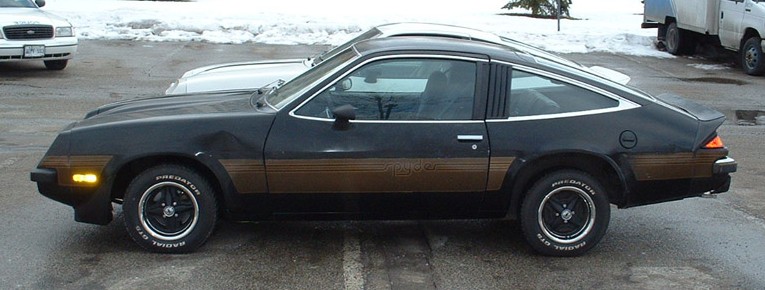
I bought (07/01) a stock, all original black 1980 Chevrolet Monza Spyder (V.I.N. # 1R07AA7269635) with 2-tone gold Spyder decal package and it came with the original build sheet from General Motors' Lordstown Plant in Ohio.. The car was originally manufactured in August of 1980 and purchased from 'Grand Chevrolet' in Glendora, California.
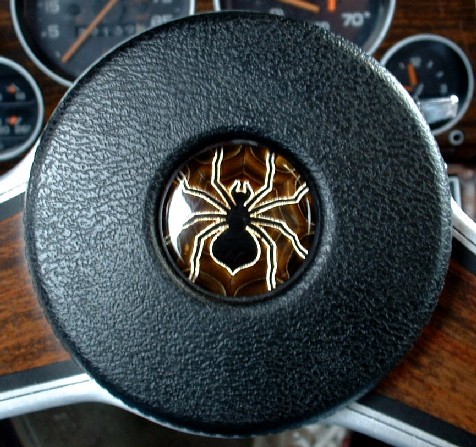
I flew out to Los Angeles near the end of July, bought the Monza Spyder in Torrance, California and drove her back home to Toronto, Ontario (3,500 miles/5,000+ kilometres). Aside from a blown radiator in southern California, she purred like a kitten the entire trip home. The Spyder has a 4-speed manual transmission, and is powered by a 3.8L, 231 C.I., V6 engine. The interior is tan with the custom vinyl interior option and air conditioning and the body has all the available Spyder options still on the vehicle, including the front air dam and rear spoiler, front and rear sway bars, front Spyder emblem and rear lock Spyder emblem as well as the Spyder steering wheel centre cap. The Monza also came equipped with power steering and brakes, tilt steering column, tinted glass, full guages with tach, heavy-duty suspension and radiator, electric clock and California emissions.
STAGE #1 - RIMS/TRIM RINGS/CENTRE CAPS
The first stage was actually completed prior to me picking up the car in Torrance, California. Since it is a factory Spyder I wanted the factory Rally II style rims with the bright trim rings and Chevy logo centre caps. Besides, I like the look of that wheel setup so it was a no-brainer. I managed to locate a full set on ebay. They were refinished flat black (which has now been repainted gloss-black) with brand new polished stainless steel trim rings and excellent condition Chevy logo centre caps. I had them sent to my brothers home in Chicago, IL which was one of my stops with the Monza Spyder on my way back home to Toronto. Picking them up in Chicago and driving with them across the border saved me the nasty brokerage, duty and tax fees I would have had to pay had they been shipped into Canada (I hope Canada Customs doesn't read this).
STAGE #2 - BLACK INTERIOR PAINTING
Removal of the interior and the repair/restoration/repainting of the interior plastic and vinyl was the first real project I undertook on the Monza. I used a vinyl spray paint to recover the vinyl pieces and restore the glossy look to it all. So far it seems to be very durable and looks great. I used a "Black Bumper" spray paint for the interior plastic as it is a little less glossy and is a nice contrast to the gloss vinyl in the car. It does look very good but I don't think it is as durable as the vinyl paint, I'll have to be careful with the interior plastic. Just a note, thorough cleaning is ESSENTIAL for any and all spray paint to adhere to the plastic and vinyl. I used "Marine Clean" made by POR 15 and it is absolutely the best cleaner/degreaser I have ever used and does a wonderful job at removing dirt, grime, grease, oil, etc. from all types of surfaces. A perfect prep product and it does not use any alcohols or other harsh chemicals that may remain on the product after cleaning.
STAGE #3 - TAN INTERIOR REMOVAL
I took everything out of the car right down to the metal floorboards and threw out all the old insulation and carpeting. Once that was completed, I vacuumed and cleaned the bare metal and prepped it for painting. Using silver POR-15 paint, I completely coated the entire interior so I will never have to deal with rust from the inside of the car. After wards, I spray painted a black truck-bed liner paint that is good for sound insulation and is a durable coating over the POR-15. Maybe a little overkill, but I wanted to add a little extra noise and heat reducation. I then insulated the entire car with double-sided foil insulation for more efficient heat and noise reducation. Once that was laid down (using 3M spray adhesive) I replaced the carpet with 1A Auto's custom carpet which turned out to be a perfect fit for my car, as advertised (very highly recommended carpet product - www.1aautomotive.com).
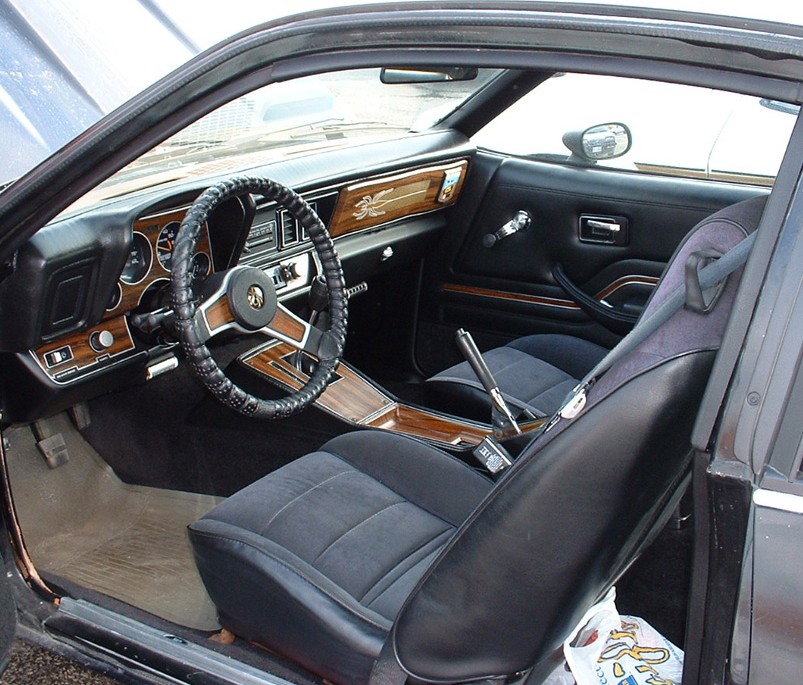
STAGE #4 - BLACK INTERIOR RESTORATION
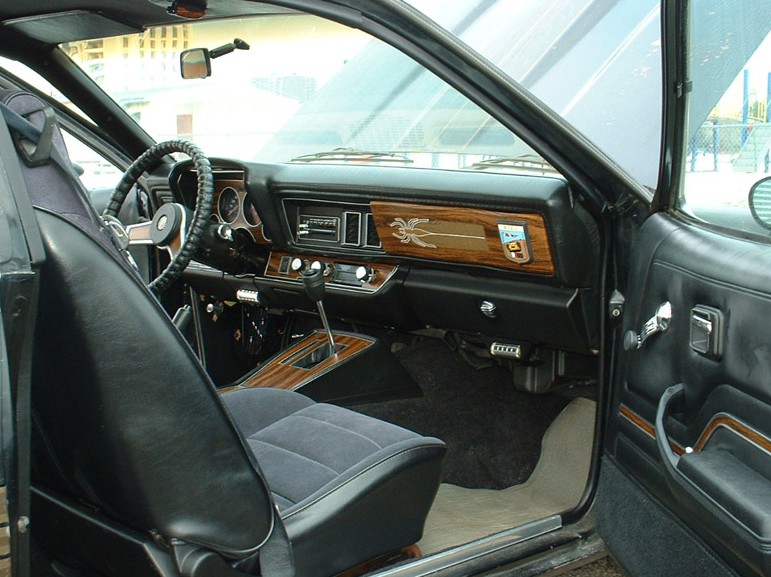
Replacing the interior was fun, NOT! It looks easy enough but if you don't do it in the proper 'order' then it becomes quite a chore and due to the "black bumper" paint I used for the plastic, also became a headache because I had to be extra careful at removing/replacing interior plastic so as not to lose the paint. There are 2 small spots where the paint chipped/flaked off but they are hardly noticable to anyone, but me (I recommend a vinyl paint over this black bumper paint for anyone trying this). The dash replacment was a bear, as I expected, but that was due to electrical problems with grounds and contacts rather than the actual physical replacement which was a little easier than I expected. Check all grounds and connections when replacing the interior as they are normally the most common problems. Now everything works as it should. I have a completely black interior with the following woodgrain inserts; sport steering wheel, guage cluster bezel, lower dash strip, dashpad insert, auto tranny plate and parking brake insert as well as the door panel "Z" strips. Woodgrain was definitely an aquired taste for me but one I definitely now have and even more so now that I have completed my interior, it looks fantastic.
STAGE #5 - PAINT/FINISH
Well, my original paint was exposed to 22 years of Southern California sunshine and was literally baked. The paint was a mess, cracked, chipped, badly faded and basically a total loss. Since my $$$ will be sunk into the engine and tranny rebuild I am forced to leave the exterior as is, for now. I tried everything I could to bring out what little shine the paint had left. I used a 1000 grit wetsandpaper, rubbing compound and wax. OK, the car still looks like hell to the average person but I notice a huge difference in the paint. Especially due to the "Colour Guard" wax by Turtle wax. It did a marvelous job at filling in cracks with black wax and made a huge difference in the look of the car. But it still looks like hell.
STAGE #6 - 231 V6/TH350 PLANS
The car has been driven to a friend's shop where he will do the engine rebuild on the Buick 231 even-fire motor. I will update once the work has been finished. Pictures are being taken throughout the rebuild and I'll post them ASAP. The TH350 transmission is also getting a full rebuild with a mild shift kit and new torque converter. I'll also get pics of that later on. Once those 2 items are completed and back in the car, it will be taken to another pro to get the custom dual exhaust installed. I'll list a lot more details of the engine rebuild once it is complete as well as post a number of pics that were taken throughout.
STAGE #7 - 231 V6/4-SPEED REMOVAL
The engine bay has been striped of all the old air conditioning components as well as all the California emmisions sensors, computers, tubes, filters and anything else having to do with emmisions control. Since my car is a 1980 and Ontario's clean air program only includes cars dating back to 1981, I can do away with a lot of the redundant California emmisions controls. I still don't want to be a huge polluter (I am a bit of a tree-hugger) so I will be installing a high flow catalytic converter to help ease the pollution expelled from the exhaust. Basically only the power steering and brakes components are present. Once the bay gets a power wash and scrub, it will be re-painted black. You just can't throw in a new engine into a dirty old engine bay, it just wouldn't be right.
STAGE #8 - PREVIOUS FRONT END DAMAGE?
It seems that this car had taken a front-end hit early on in it lifetime. There is bronze welding in the engine bay up front, near the shock absorber braces. It is ungainly looking and not well finished and basically is aethetically unappealing. Fortunately the job was well done and structurally the front end is more than acceptable for regular driving. It just needed some grinding and polishing prior to the repaint so it looks professional.
Click on Red Monza at top left to go to Page #2
TO PAGE #2